 Rotate Multiple Material Command
- Step-By-Step
- Tips and Tricks
- Related Tools
1 . Preselect one or more materials to enable the Materials contextual page and click the Rotate Multiple Material icon found in the Modify section. Skip step 2.
Alternative : Invoke Rotate Multiple Material using the Find Tool by searching the command name and clicking the Rotate Multiple Material icon, which is pictured above. Proceed to step 2.
Learn more about alternative methods for launching commands.
2 . Select one or more materials.
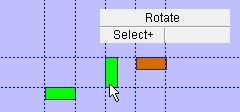
Method 1 : Right-click and select "OK" from the shortcut menu.
Method 2 : Press the Enter key.
Alternative : You can press the Esc key or right-click and choose "Cancel" on the shortcut menu to end the command.
3 .The status line prompts, " Locate far axis point ." Place the mouse pointer ( ![]() ) so the target (
) so the target ( ![]() ) snaps to a point in the plane you want to rotate in, then left-click ( Locate ).
) snaps to a point in the plane you want to rotate in, then left-click ( Locate ).
Example 1 (same plane) : This is an example of how to rotate multiple materials that are in planes that are all parallel to one another (material elevations may vary). The final result will rotate the materials on the same plane they are currently located on.
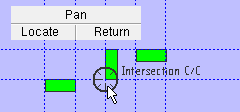
Example 2 (out of plane) : This example shows the rotation of materials around an axis that is in the work plane of a plan view (material elevations may vary). The final result will rotate the materials out of the plane they are currently located on.
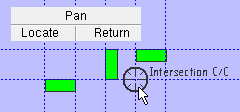
4 . The status line prompts, " Locate near axis point ".
Example 1 (same plane) : Place the mouse pointer (
) so the target (
) snaps to the same point you located in step 3, then left-click ( Locate ). Picking the same point twice in that work plane establishes a rotational axis that is perpendicular to the work plane. Rotating around that axis will keep the materials on the same planes they are currently located on.

Example 2 (out of plane) : Place the mouse pointer (
) so the target (
) snaps to a location that is away from the far axis point created in step 3, then left-click ( Locate ). In this example, the near axis point is to the left of the far axis point. Picking different points establishes a rotational axis that is parallel to the work plane. Rotating around that axis will move the materials out of the planes they are currently located on.

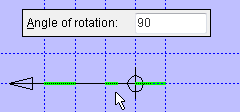
5 . The "Angle of rotation" window opens.

" Angle of rotation " accepts any positive or negative number of degrees. Given that you are looking along the rotational axis toward its pointer end, a positive number rotates the selected materials counterclockwise around the rotational axis. A negative number rotates them clockwise around the axis.
sets the selected materials back to the positions they were in originally, before Rotate Multiple Material was invoked .
rotates the selected materials 90º counterclockwise around the rotational axis.
lets you set the " Angle of rotation " by locating two points in the model. If you don't like the results, press the " 0 " button and try again.
applies the " Angle of rotation " to the actual materials in the model. Until you press " OK ," the displayed positions of the material is just a preview.
ends the Rotate Multiple Material operation without any materials actually changing their positions in the model.
6 . When you have entered an " Angle of rotation " that rotates the materials to the correct location, press the " OK " button.
Example 1 (same plane) : Since the rotational axis is perpendicular to the work plane (as defined by Step 3 and 4 above), rotating around that axis keeps the materials in their same planes.
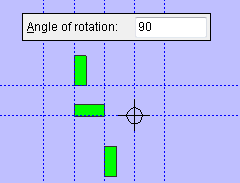
Example 2 (out of plane) : Since the rotational axis is parallel to the work plane (as defined by Step 3 and 4 above), rotating around that axis moves the materials out of the work plane.
- Rotate Material (rotates a material around its origin point)
- Copy Material (material can be rotated when being copied)
- Rotate View (rotates a 3D erection view)


